# Use Alert for Faster Response to Firewall Brute Force Attack
This contextual alert provides notifications about the attacker’s IP address and geolocation when a possible brute force attack is detected.
A contextual alert template is available for download below.
[Download Alert](https://logmanager.com/wp-content/uploads/2026/05/alert.xml_.zip)
## What Is a Firewall Brute Force Attack?
A firewall brute force attack is a systematic attempt to gain unauthorized access to a network by repeatedly and automatically trying a large number of login credentials until the correct combination is found (for example, for VPN or SSH access).
## Why Use This Alert?
The usefulness of sending an alert with the geolocation of the attack source, for example, after 10 failed attempts from a single source IP address, lies in the rapid detection of incidents and threat identification.
Knowing the geographic origin of the attack (e.g., outside predefined trusted countries) allows the security team to immediately assess the risk and, if necessary, automatically block either the specific IP address or the entire geographic region. This minimizes the attacker’s opportunity window and improves the overall incident response capability.
## Configure a Context-Aware Firewall Alert in Logmanager
After a defined number of invalid login attempts on the firewall from a single IP address, the alert sends a notification containing the source IP address of the potential attack and the country from which the attack originates.
## Step 1: Create a Correlation Window
In the **Alerts & Actions** menu, under the **Correlations** tab, create a new correlation window with the desired duration (for example, 60s). Name the window something like `Firewall`.
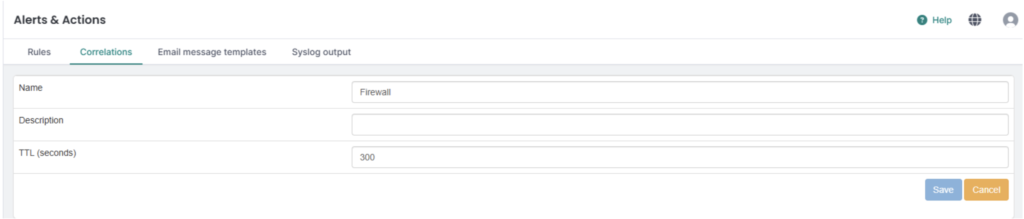Save the window by clicking the **Save** button.
## Step 2: Create an Email Alert Template
In the **Email message templates** section, create a new template and insert the following details:
**Name:**
too many login failed from one IP
**Subject:**
LM Alert – {{name}} / {{ msg.failed\_remote\_ip }}
**Body:**
```
{% extends "base.html" %}
{% block title %}Alert{% endblock %}
{% block content %}
VPN alert - neplatné přihlášení z jedné IP adresy. Uživatel {{ msg.username }} překročil limit.
Reason: {{ msg.logdesc }}
Reason: {{ msg.msg }}
Reason: {{ msg.reason }}
Remote IP & Country: {{ msg.failed_remote_ip }}
Uživatel: {{ msg.username }}
Alert message
Alert name: {{ name }}
Alert description: {{ description }}
Message meta information
| Name |
Value |
{% for key in meta|sort %}
{% if key == "src" %}
{% for src in meta.src|sort %}
| {{ key }}.{{ src }} |
{{ meta.src[src] }} |
{% endfor %}
{% else %}
| {{ key|e }} |
{{ meta[key]|e }} |
{% endif %}
{% endfor %}
Message data
| Name |
Value |
{% for key in msg|sort %}
| {{ key|e }} |
{{ msg[key]|e }} |
{% endfor %}
{% if dropped > 0 %}
Dropped similar messages: {{ dropped }}
{% endif %}
{% endblock %}
```
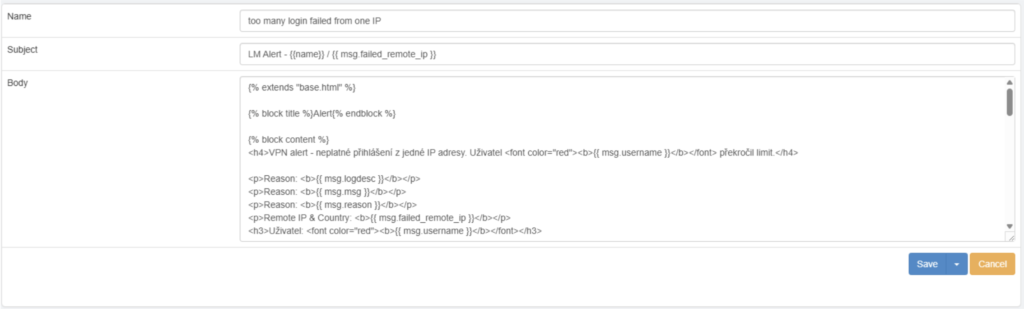Save the template by clicking **Save**.
## Step 3: Import and Configure the Alert Rule
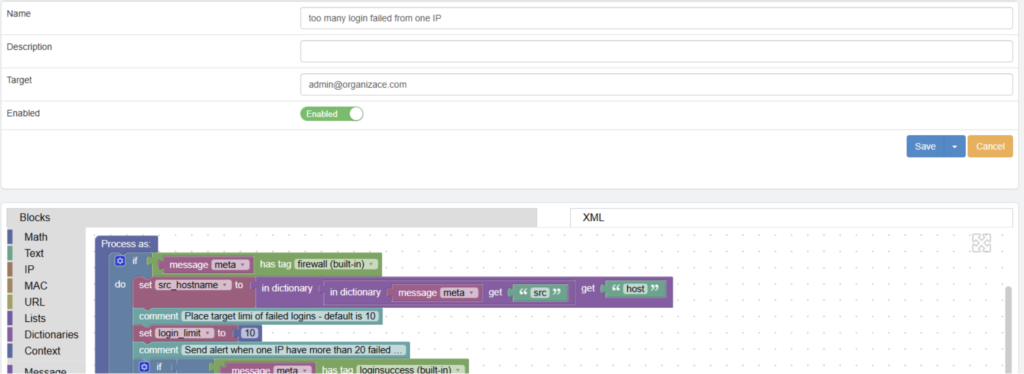
Under the **Rules** tab, create a new alert and paste the alert code into the XML window.
Then switch to the **Blocks** window.
Assign the alert a name, for example:
`too many login failed from one IP`
Enter the recipient email address for the alert and switch the alert status to **Enabled**.
## Step 4: Set the Failed Login Threshold
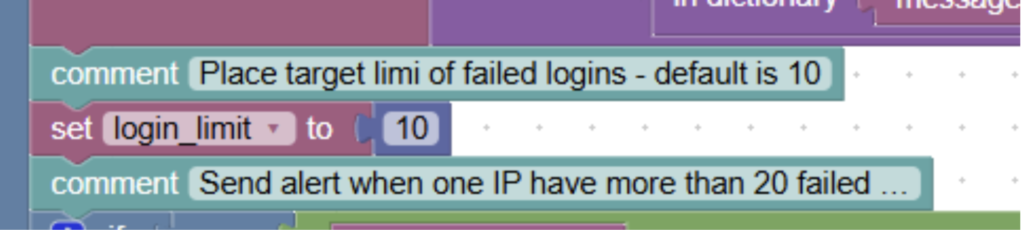
In the Blockly code of the alert, configure the required threshold for failed login attempts after which the alert should be triggered.
In this example, the value is set to `10`.
## Step 5: Select the Correlation Context
In the **Context** block, select the previously created correlation window.
## Step 6: Assign the Email Template to the Alert
At the end of the alert configuration, in the **send alert** block, select the previously created email template.
## Contextual Firewall Alert Is Ready
You are now fully prepared to send alerts containing both the attacker’s IP address and geolocation.