Virtual Logmanager Deployment Guide
Version 4.0.4 and newer · November 2025
On this page
Need more help?
Full documentation is available in the Logmanager docs portal.
Prefer a guided session? You can schedule a call with an expert.
This quick start guide helps you deploy the Virtual Logmanager appliance on VMware ESXi / vSphere, Microsoft Hyper-V, or Proxmox VE, configure networking, and log in to the web interface for the first time.
Introduction
Logmanager is available both as a hardware appliance and as a virtual machine. The currently supported virtual platforms are VMware ESXi, Microsoft Hyper-V, and Proxmox VE. Virtual Logmanager is designed to run on-premises in your datacenter.
Overview
Two different virtual images are available:
- OVA — can be imported directly into VMware ESXi / vSphere and used on other KVM-based platforms such as Proxmox VE. Most configuration options such as memory and vCPUs are pre-set.
- VHDX — a virtual hard disk for Microsoft Hyper-V. When working with the VHDX file, you must configure virtual hardware (RAM, vCPUs) on the Hyper-V side.
Requirements
OS Requirements
- VMware: ESXi 7.0 or higher
- Microsoft Hyper-V: Windows Server 2012 R2 or higher
- Proxmox VE: recent Proxmox VE with KVM virtualization enabled
Hardware Requirements
| EPS | CPU specifications | RAM | Minimum storage |
|---|---|---|---|
| 1000 | 4 vCPU with at least 1600 points single core in PassMark | 16 GB | 100 GB SSD (at least 300 IOPS) |
| 5000 | 16 vCPU with at least 1900 points single core in PassMark | 64 GB | 100 GB SSD (at least 700 IOPS) |
| Forwarder | 2 vCPU | 6 GB | 100 GB (at least 200 IOPS) |
Additional disks
It is necessary to add an extra disk both for Virtual Logmanager and for Virtual Logmanager Forwarder. The additional disk is used for data storage / cache.
Additional disks can be added later to increase storage or cache size. Removing or shrinking an already initialized drive is not supported, so do not start with an unnecessarily large disk.
Deploy the Virtual Appliance
Choose your virtualization platform below. For detailed video walkthroughs, see: VMware deployment video and Hyper-V deployment video.
Step-by-step wizard
Click a step to see details and screenshots.
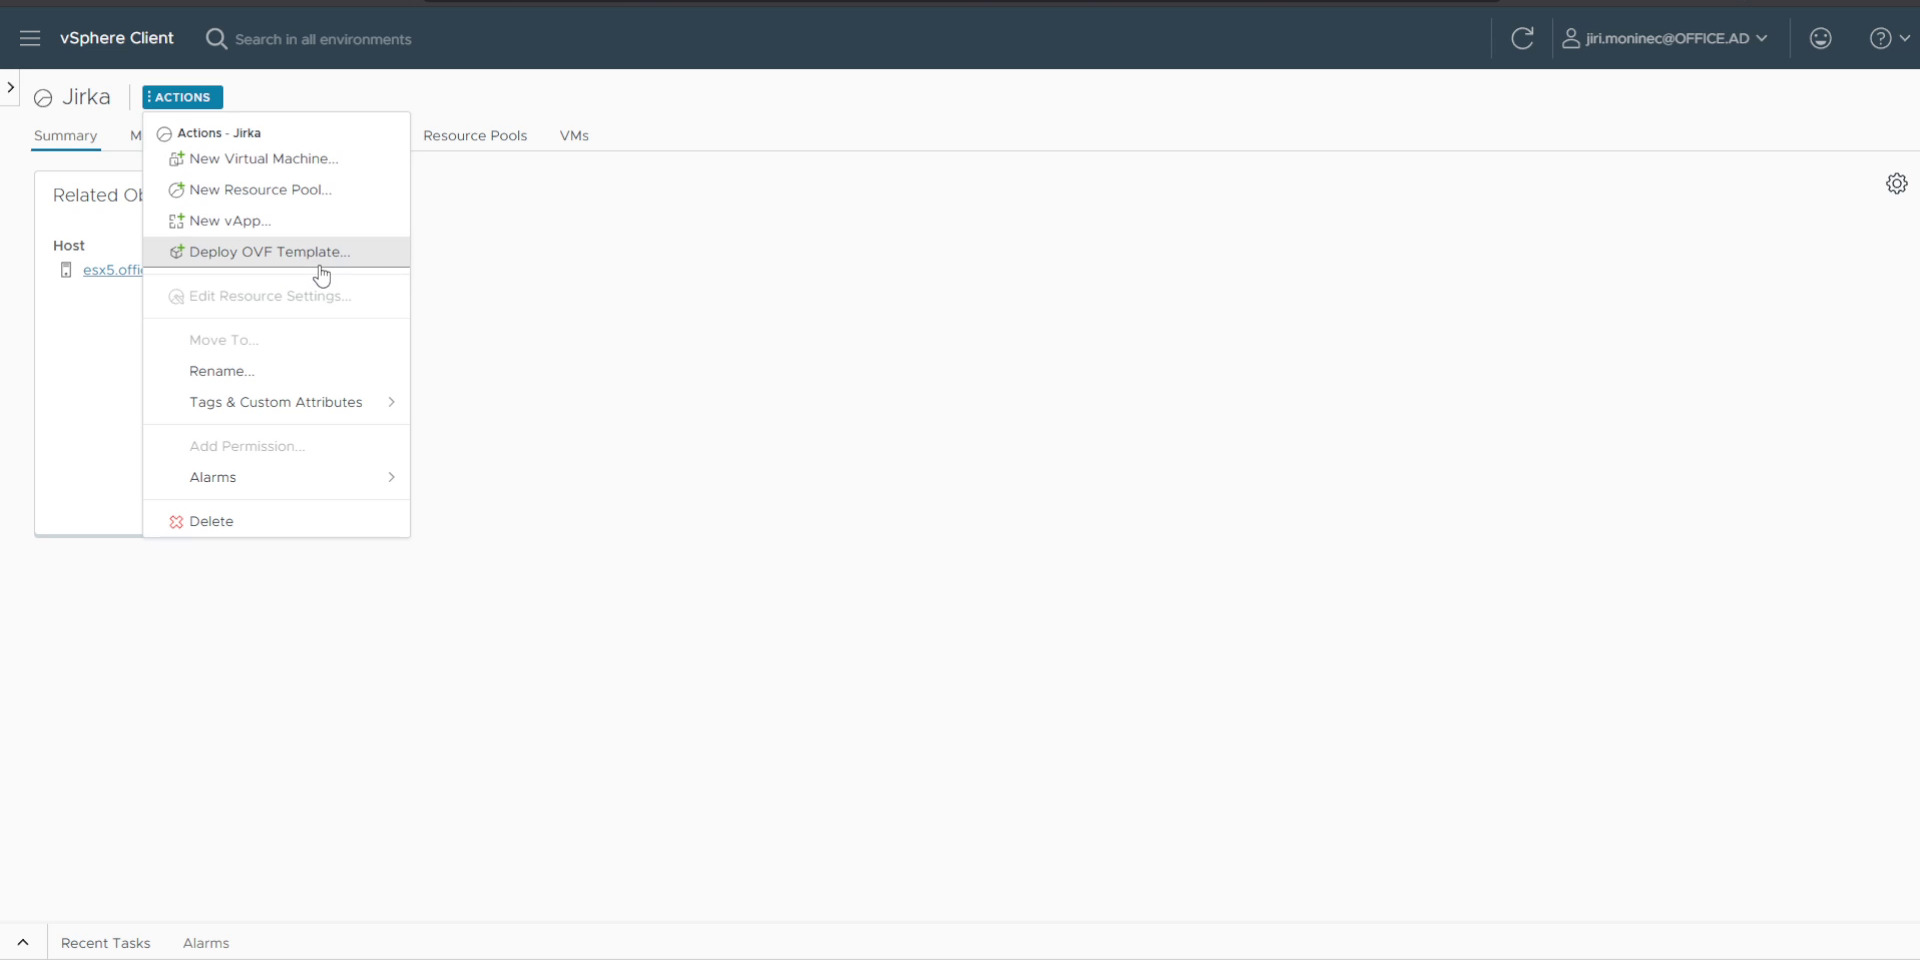
1. Use Deploy OVF Template
In the vSphere / ESXi client, right-click your cluster, host, or datastore and select Deploy OVF Template.
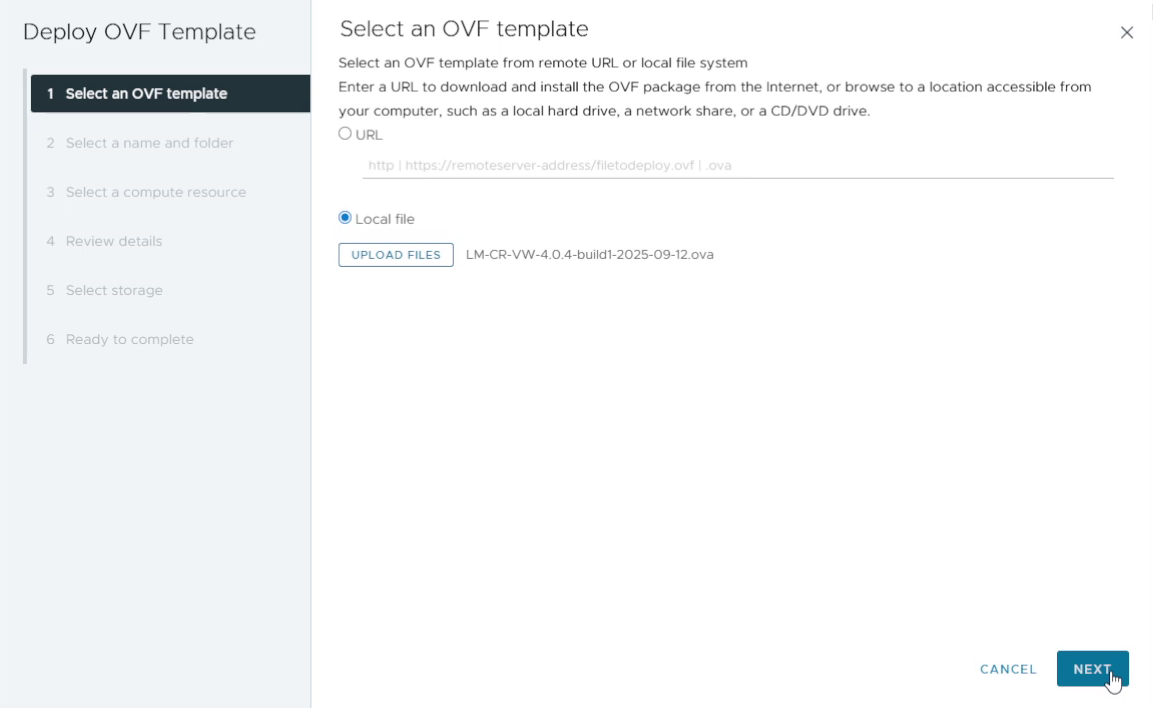
2. Select the downloaded OVA file
Browse to the Virtual Logmanager .ova file you downloaded and click Next.
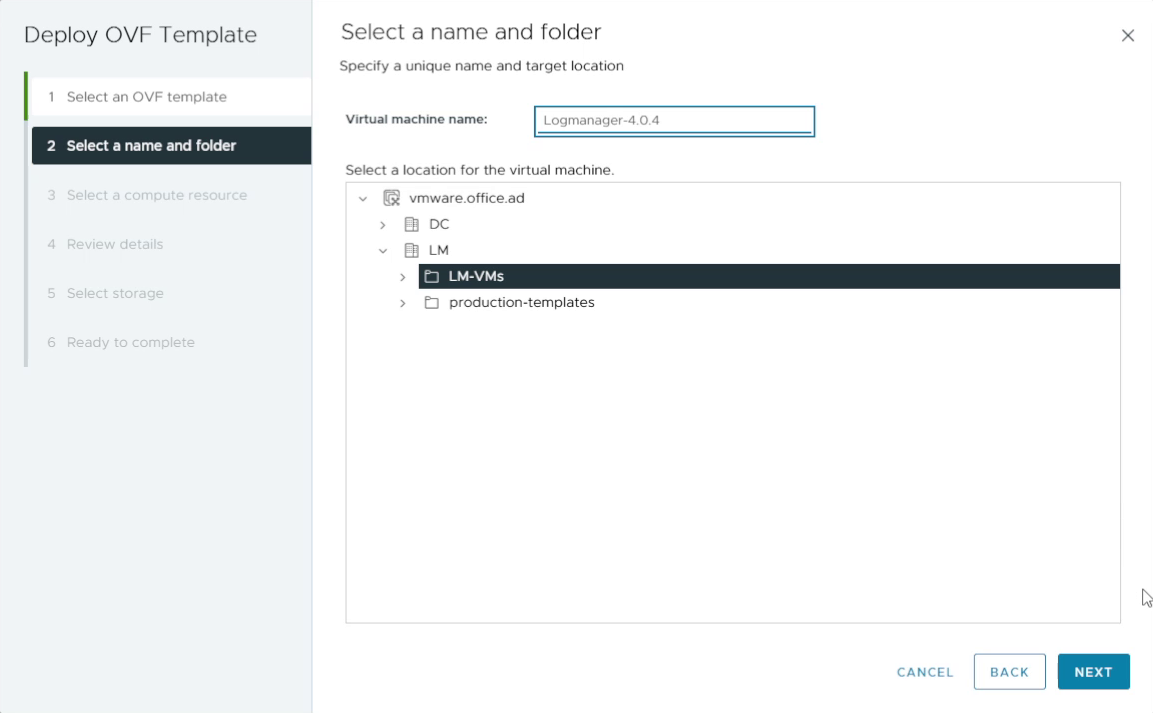
3. Name the VM and choose a folder
Enter a meaningful virtual machine name and choose the target folder or inventory location. Click Next.
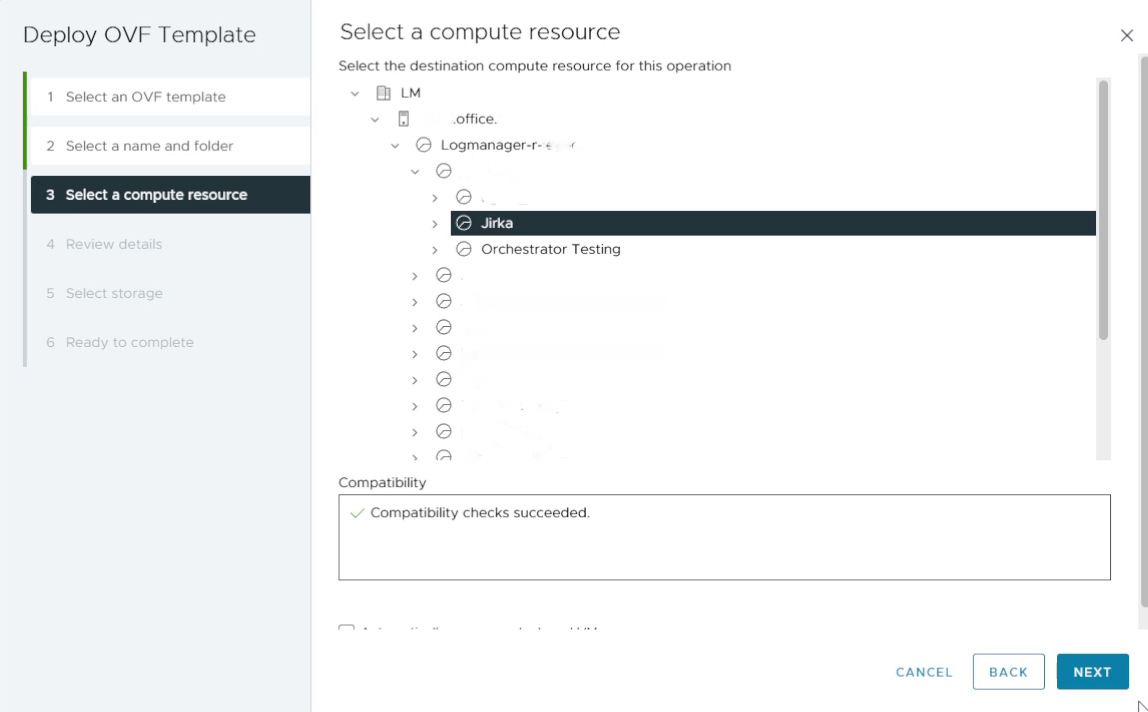
4. Select a compute resource
Choose the host or cluster that will run the Virtual Logmanager VM and click Next.
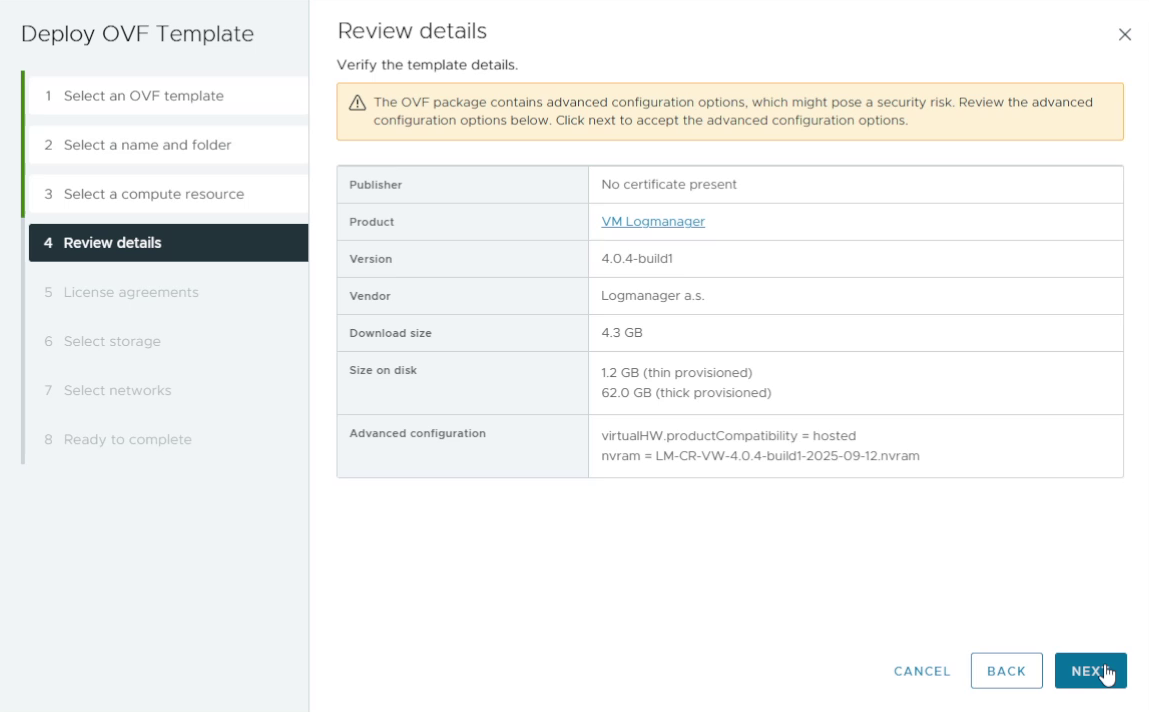
5. Review template details
Review the OVF template details and confirm that the configuration matches your expectations. Then click Next.
6. Accept the license agreement
Read and accept the license agreement, then click Next.

7. Select storage
Choose the datastore where the virtual machine files will be stored and click Next.

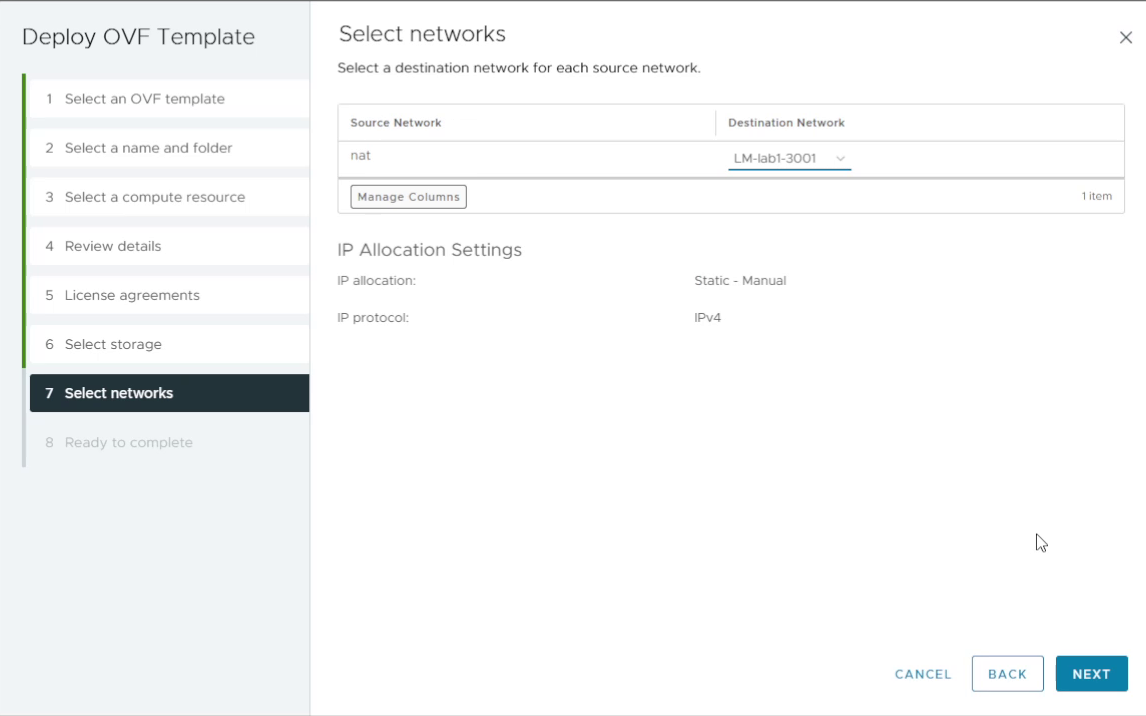
8. Select the target network
Select the virtual network / port group that the VM will use and click Next.
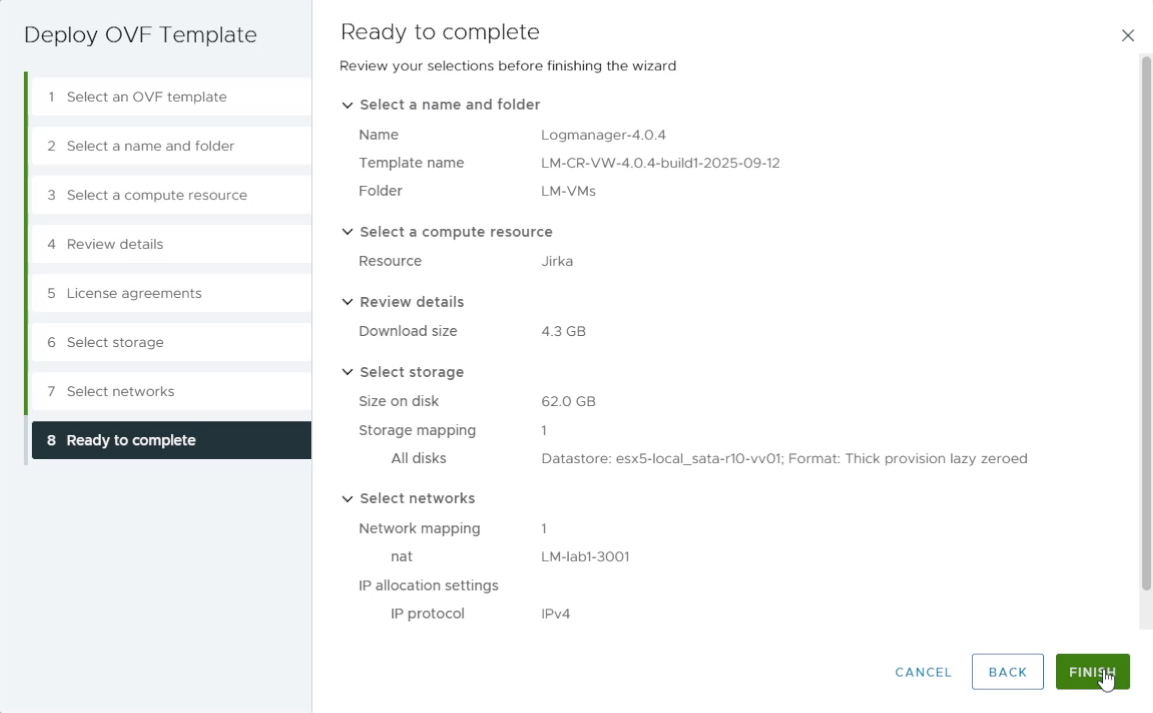
9. Review and finish the deployment
Review the final summary. If everything is correct, click Finish to deploy the VM.
10. Adjust vCPU and RAM
After the VM is created, open its hardware settings and adjust vCPUs and RAM according to your desired EPS and the Hardware Requirements table.
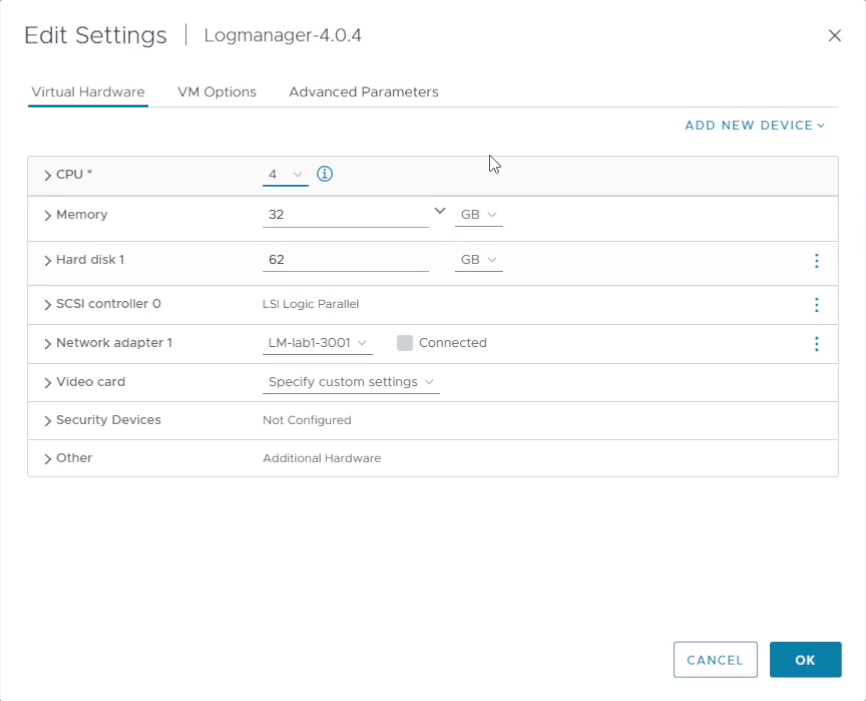
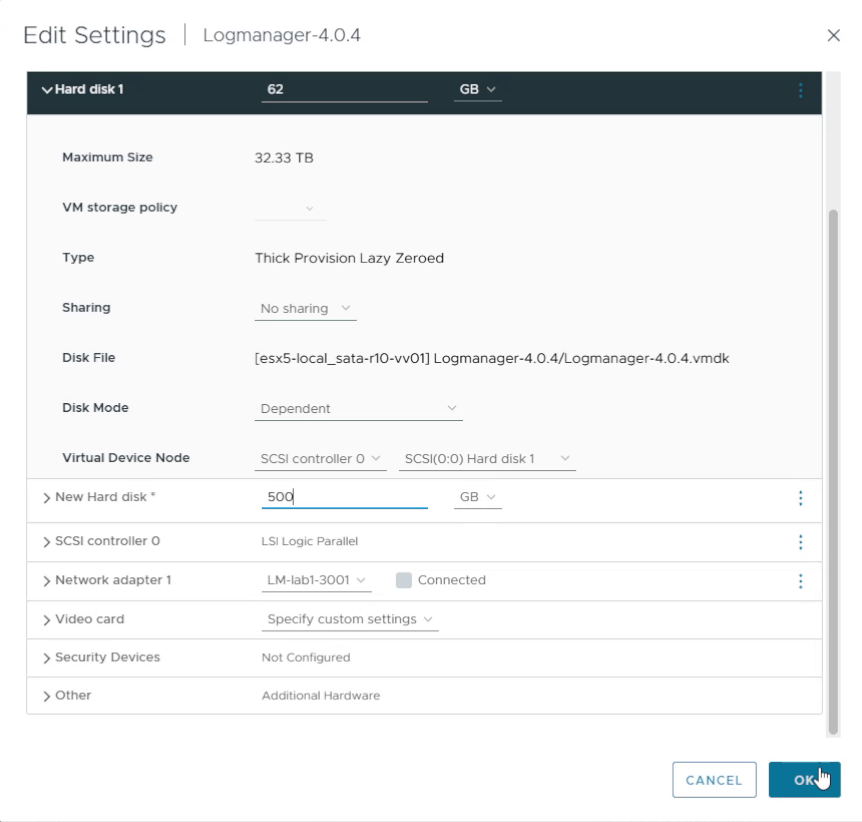
11. Add an extra data disk
Add an additional virtual hard disk for data storage/cache. Choose the disk size according to your license and your expected log volume.
12. Power on the virtual machine
Power on the Virtual Logmanager VM. When it boots, you can proceed with CLI networking configuration and the web UI login.

Step-by-step wizard
Click a step to follow the setup.
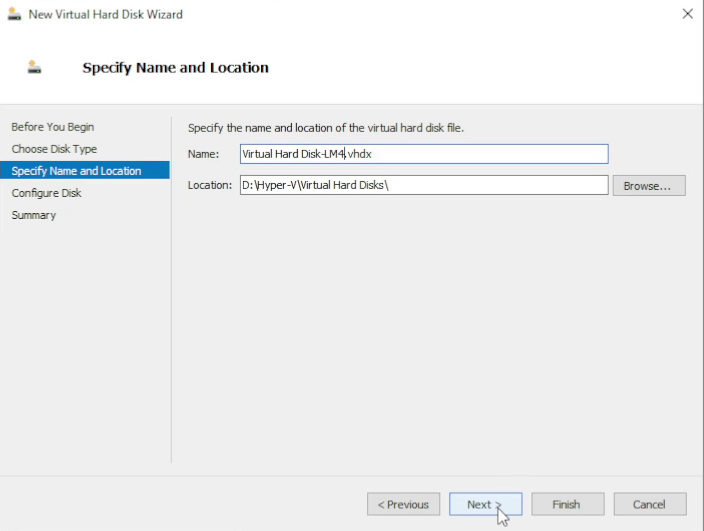
1. Copy the VHDX file
Copy the Logmanager Forwarder .vhdx file to the desired storage location on your Hyper-V server.
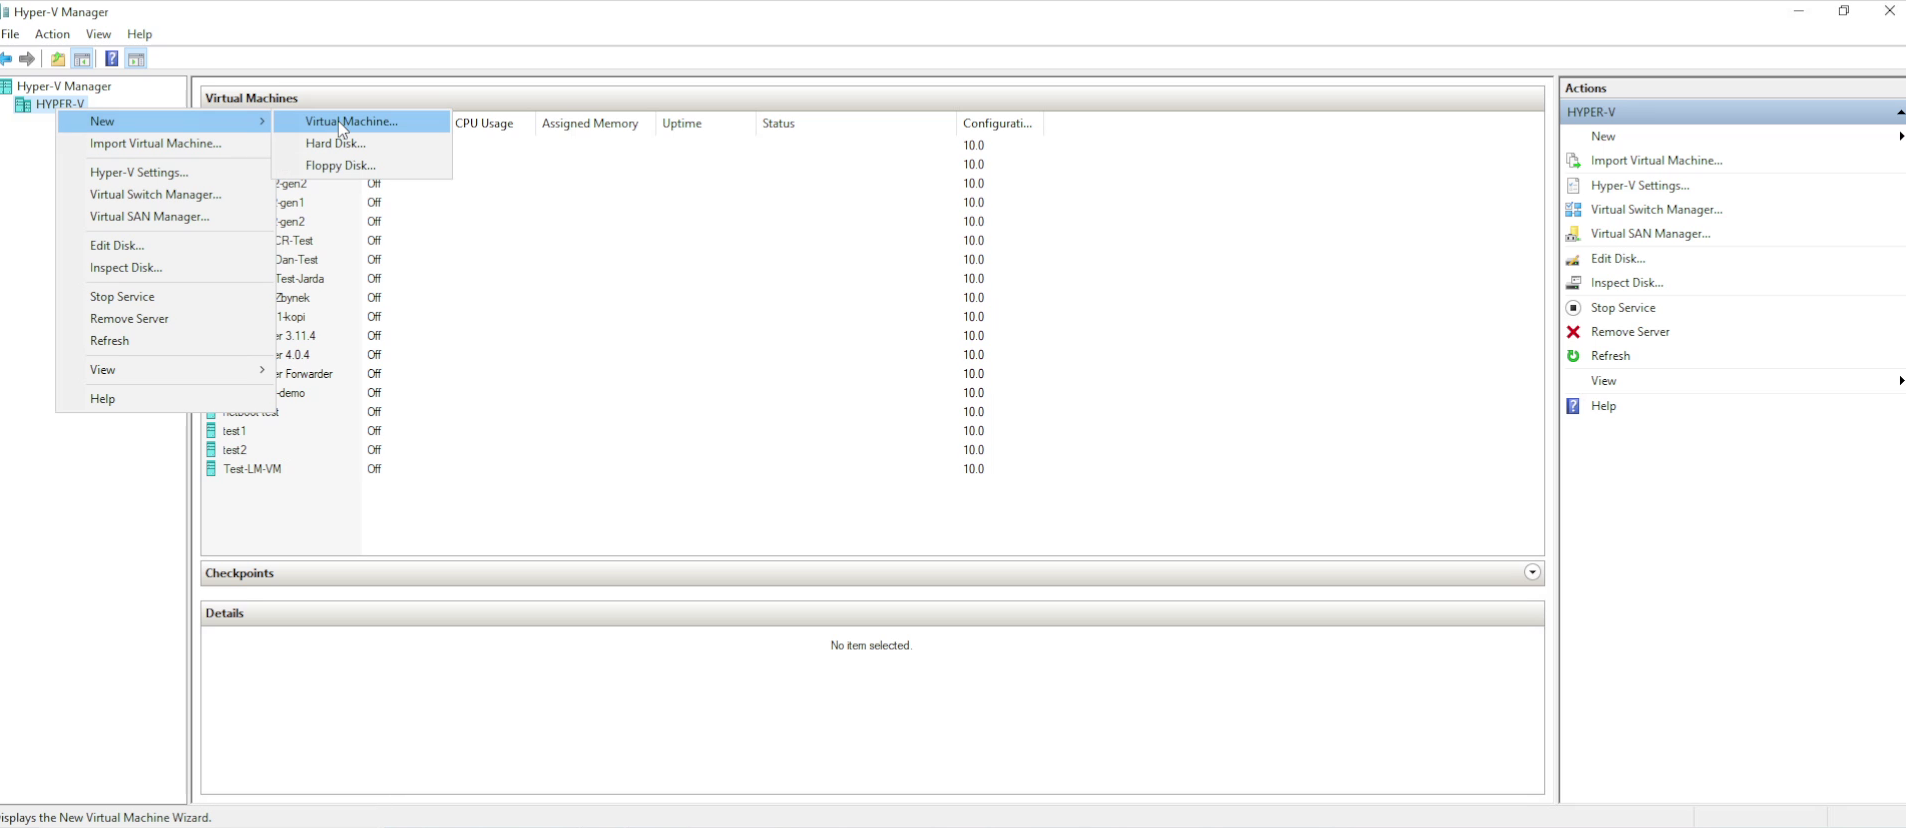
2. Open Hyper-V Manager
Connect to the Hyper-V server and open the Hyper-V Manager console.
3. Create a new virtual machine
In the left pane, right-click the server name and choose New > Virtual Machine.
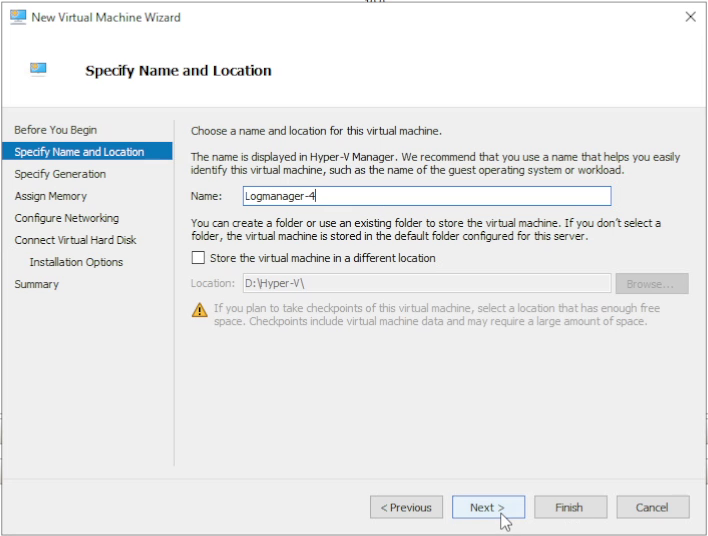
4. Choose storage location
Name your server, then optionally select Store the virtual machine in a different
location and specify where the VM configuration will be stored.
By default it is saved under
C:\ProgramData\Microsoft\Windows\Hyper-V\.
5. Select Generation 2
On the Specify Generation screen, choose Generation 2 and continue.

6. Assign memory
In Assign Memory, configure the VM memory. Follow the Hardware Requirements and allocate at least 16 GB RAM.

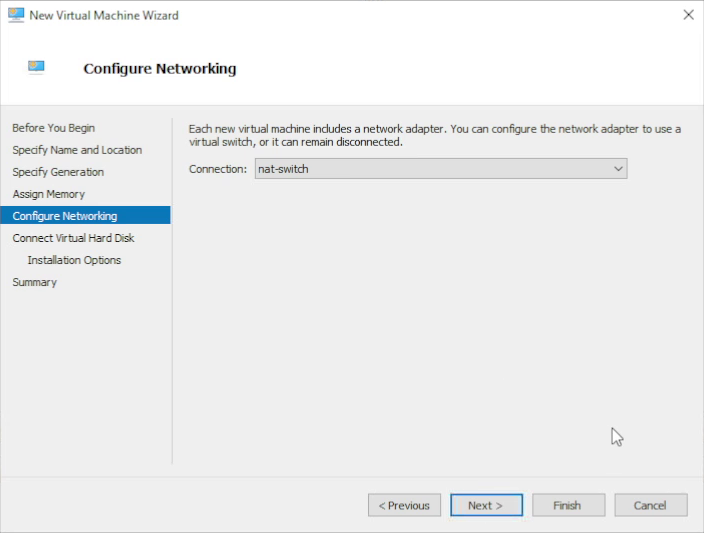
7. Configure networking
On Configure Networking, select the virtual switch through which the VM will communicate on the network.
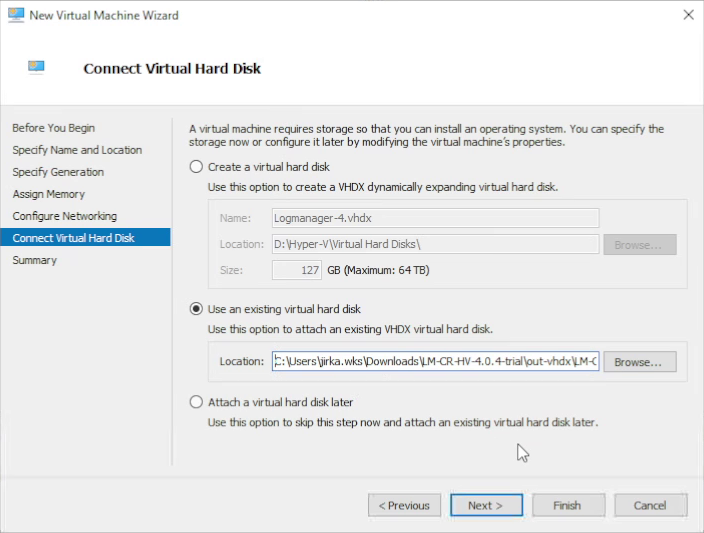
8. Attach the existing VHDX disk
In Connect Virtual Hard Disk, select Use an existing virtual hard disk and specify the path to the Logmanager .vhdx file. Click Next.
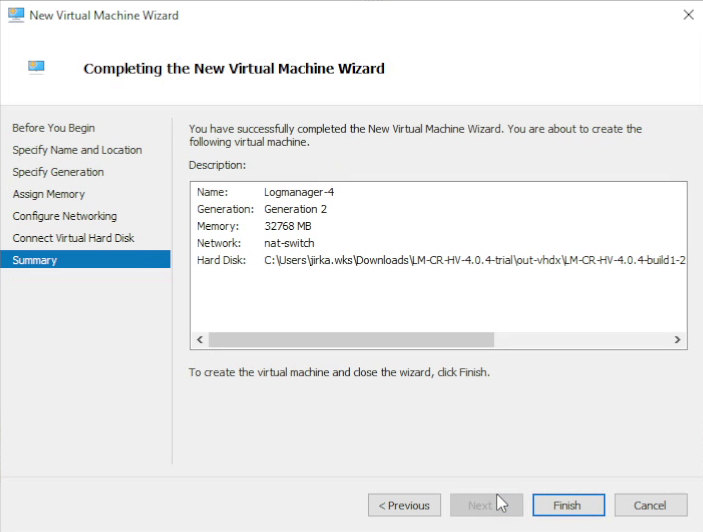
9. Confirm the summary
Check the summary of VM parameters and confirm with Finish.
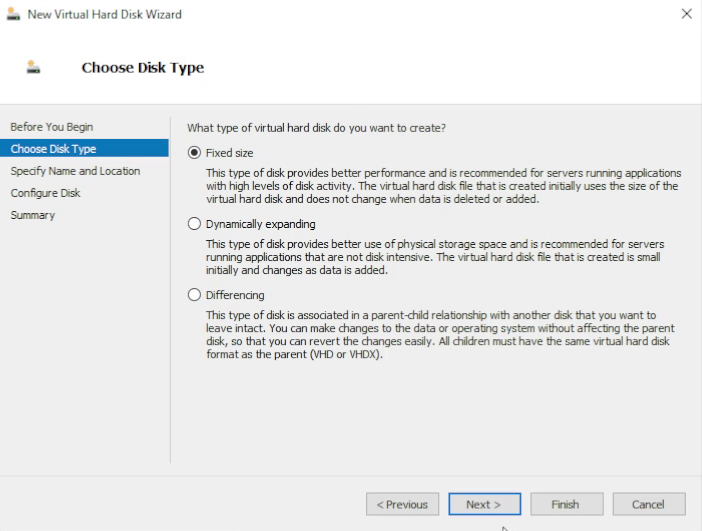
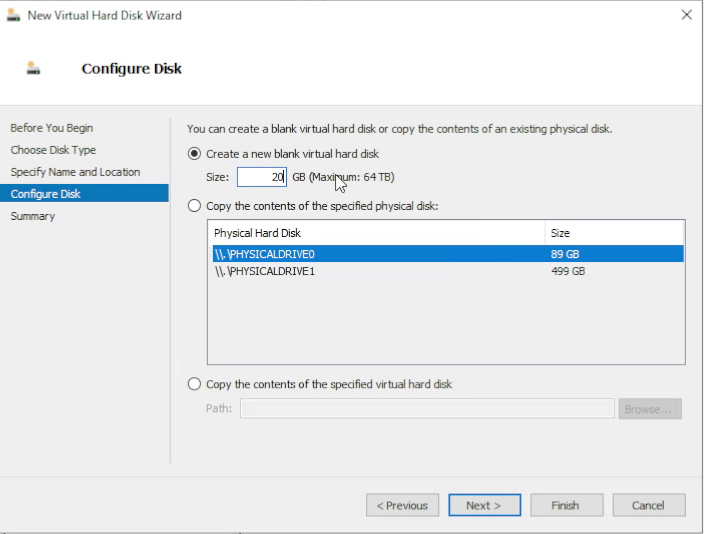
10. Add a new data disk
In Hyper-V Manager, right-click the newly created VM and select Settings. In the Settings window, select IDE Controller 0 and click Add to add a new hard drive. For best performance, choose Fixed size for the new data disk and continue.
11. Choose the path for the secondary disk
Specify the path for the secondary virtual disk file and click Next.
12. Set disk size according to your license
Choose the disk size according to your license and expected log volume. Review the disk configuration and click Finish.
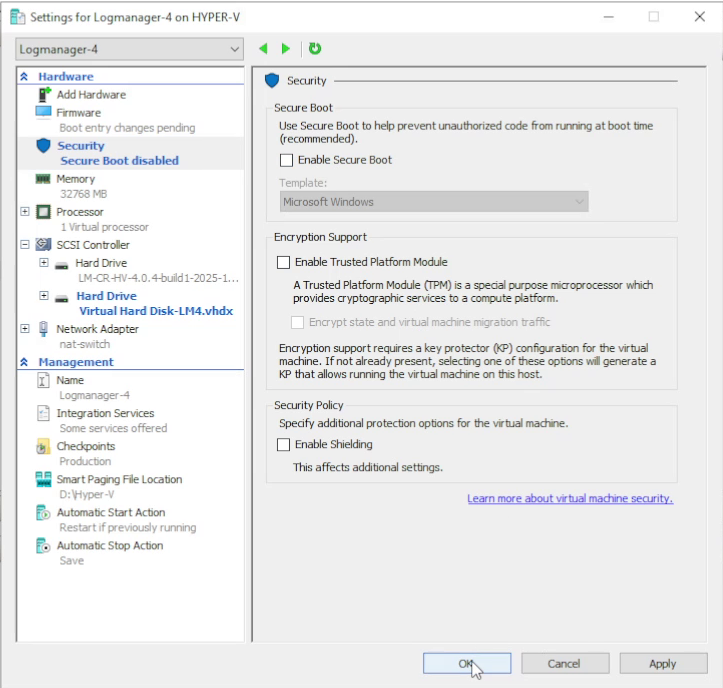
13. Disable Secure Boot
In Security settings for the VM, uncheck Enable Secure Boot.
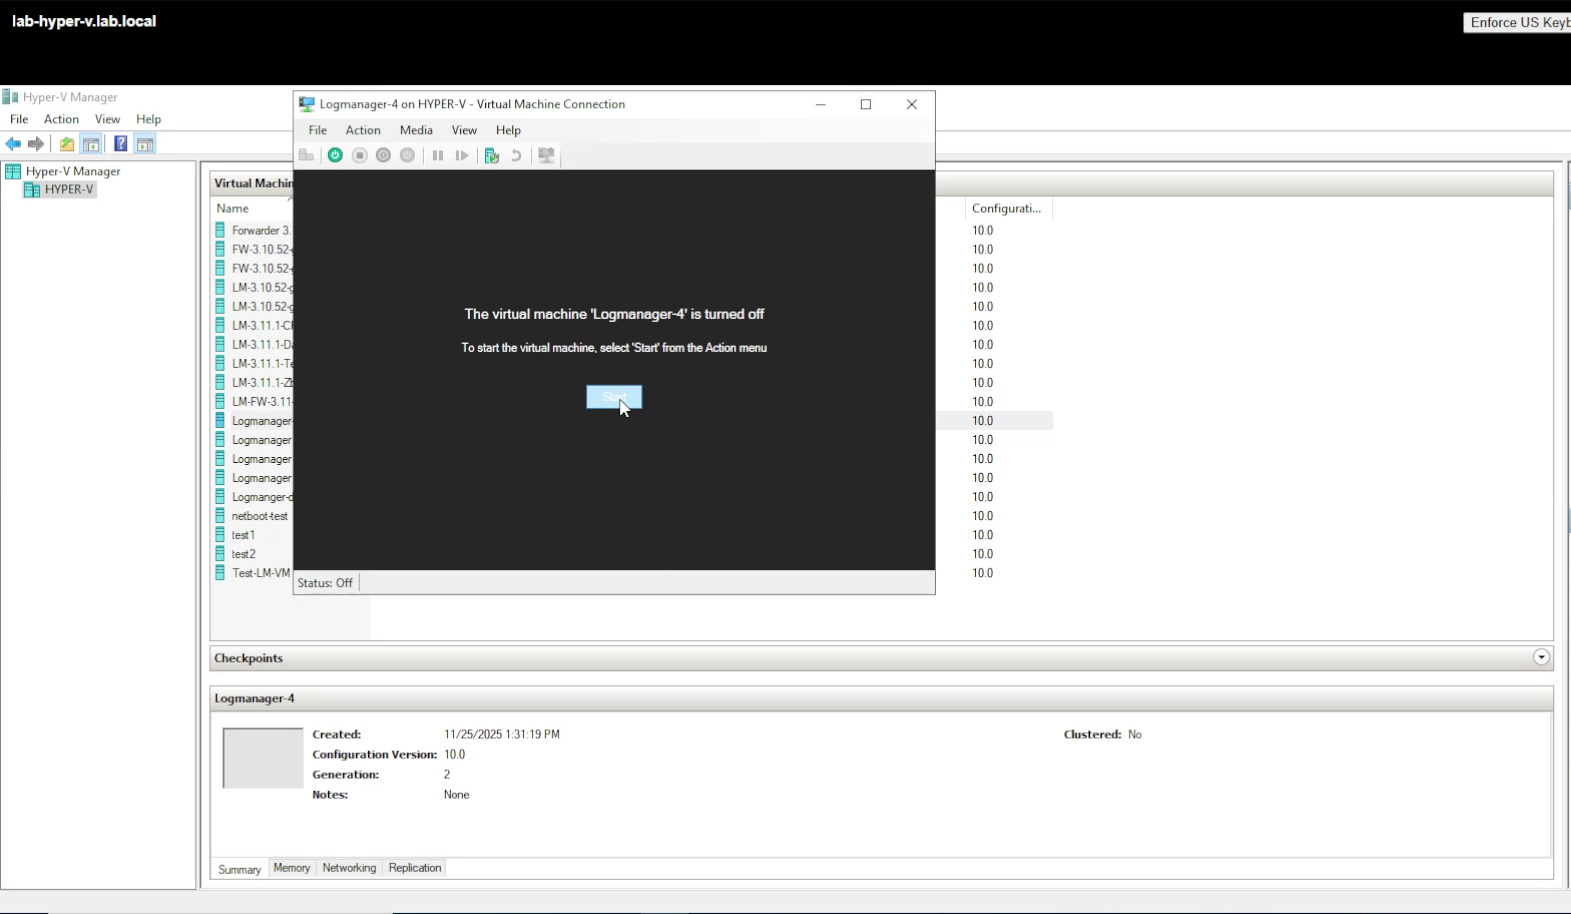
14. Start the virtual machine
Finally, start the virtual machine. When it boots, you can continue with CLI networking configuration and the web UI login.
Configure Virtual Logmanager
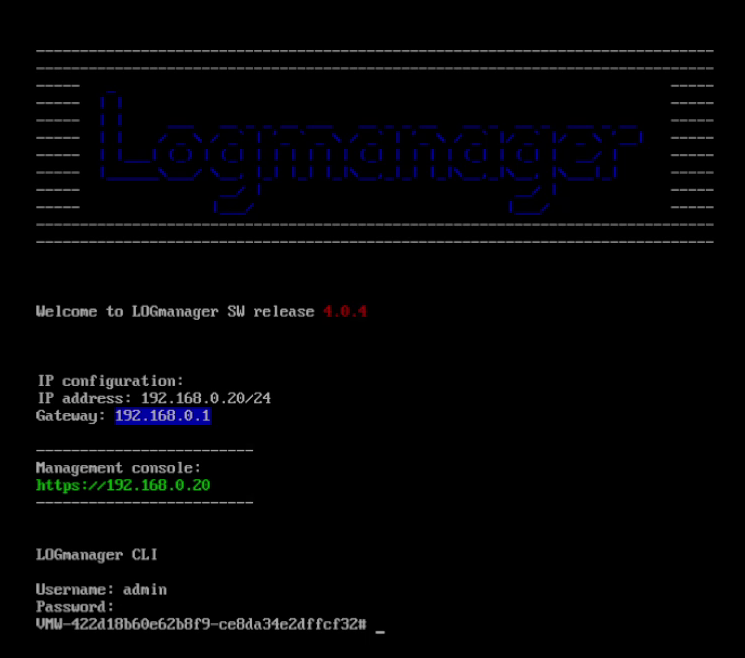
Once the VM is running, open the virtual console from your hypervisor and log in to the text console with the default credentials:
- Username: admin
- Password: admin
You will perform initial network configuration from the limited Logmanager CLI. For more commands, see the official CLI documentation.
Configuring an IP address
Virtual Logmanager uses static IP addresses. Before you start, decide on the network information you want to use, for example:
- IP address:
192.168.1.29 - Netmask:
255.255.255.0 - Gateway:
192.168.1.1
Then follow the steps below on the VM text console.
Step 1: Add the new static IP
Command syntax:
set ip ip_address network vlanExample:
set ip 192.168.1.29 255.255.255.0 default_vlanStep 2: Delete the default route
Command syntax:
delete route target netmask gwExample:
delete route 0.0.0.0 0.0.0.0 192.168.0.1Step 3: Add the new route
Command syntax:
set route target netmask gwExample:
set route 0.0.0.0 0.0.0.0 192.168.1.1Step 4: Delete the default IP
Command syntax:
delete ip ip_address network vlanExample (removing the old default address):
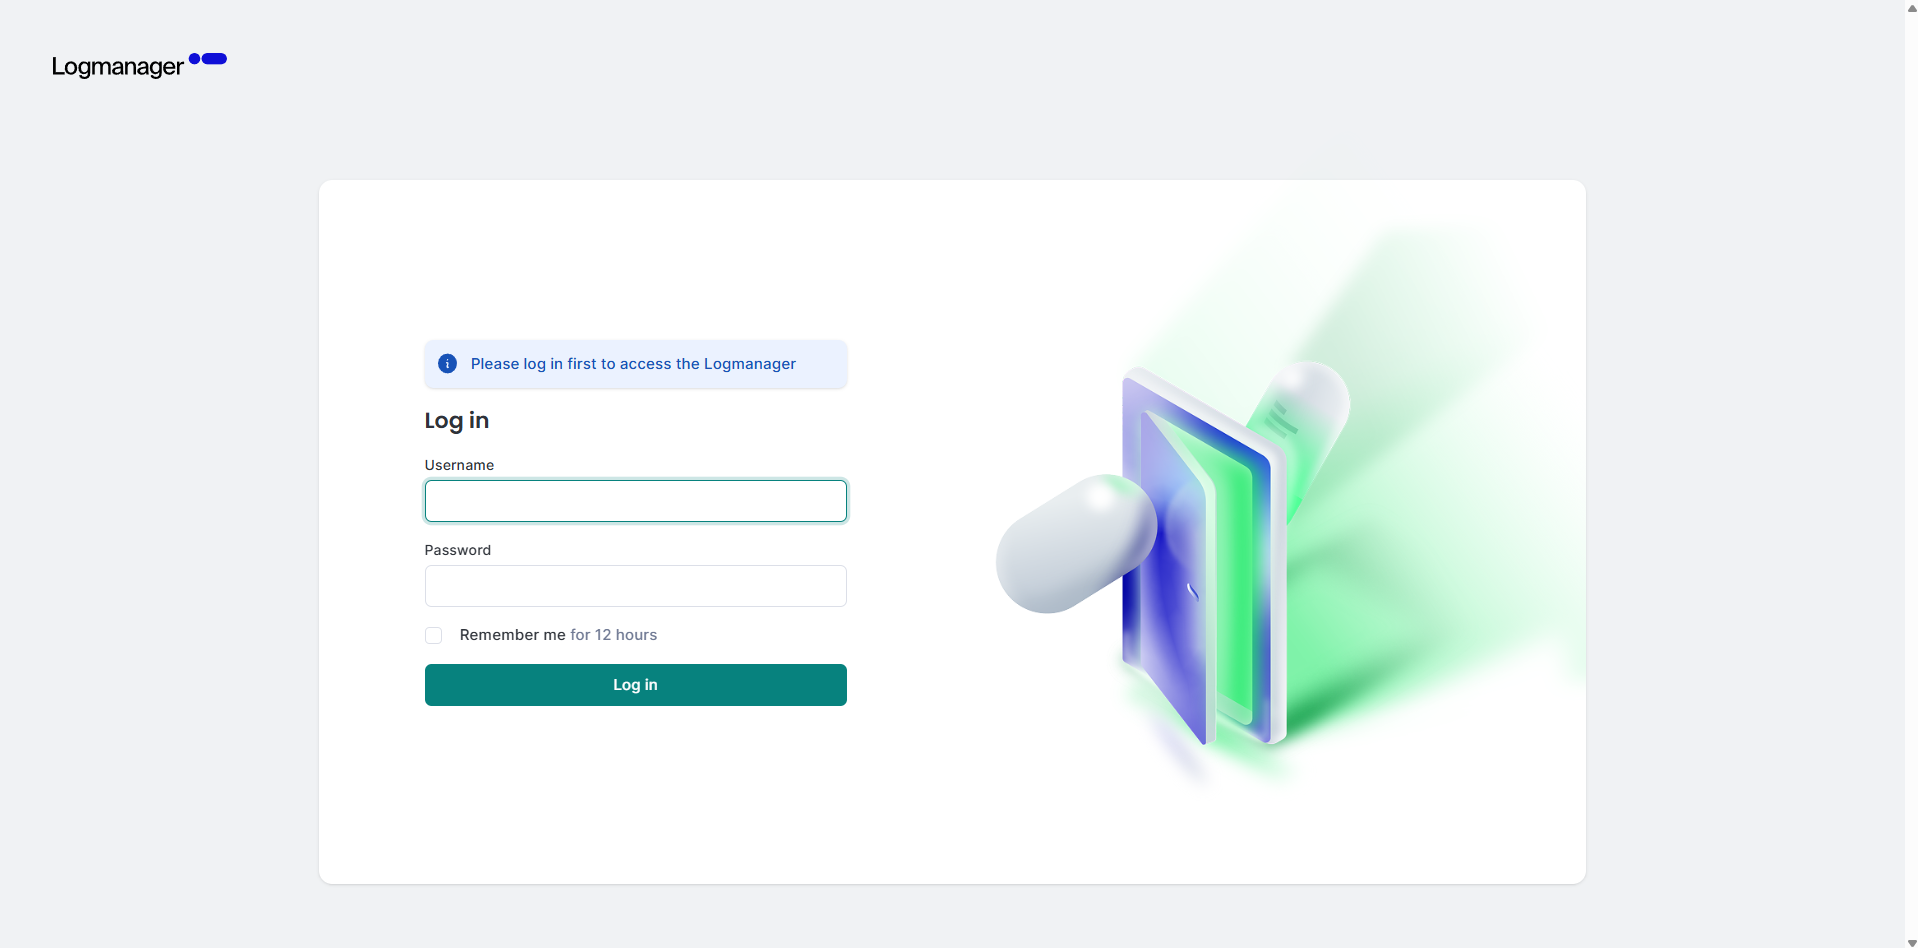
delete ip 192.168.0.20 255.255.255.0 default_vlanLogin to the Web UI
After you configure the static IP address and default route, you can access the Logmanager web interface from your browser:
https://YOUR-IP-ADDRESS/Log in with your administrative credentials and continue with the standard product configuration.